This page explains how to add actual content into a specific sub-screen.
If this is your first attempt, the easiest way to start is: add one image into one sub-screen.
Step 1: Select the Target Sub-screen First
First select the sub-screen where you want to add the material.
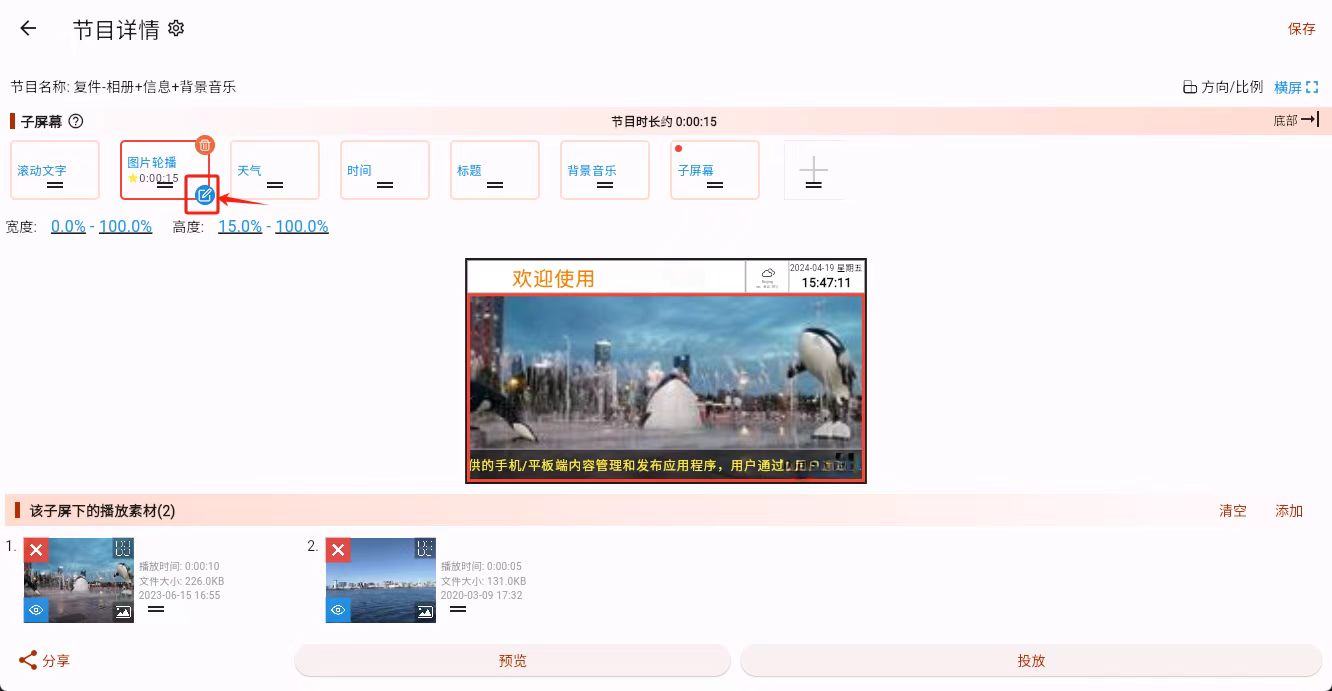
If you do not select the sub-screen first, the material may be added to the wrong area.
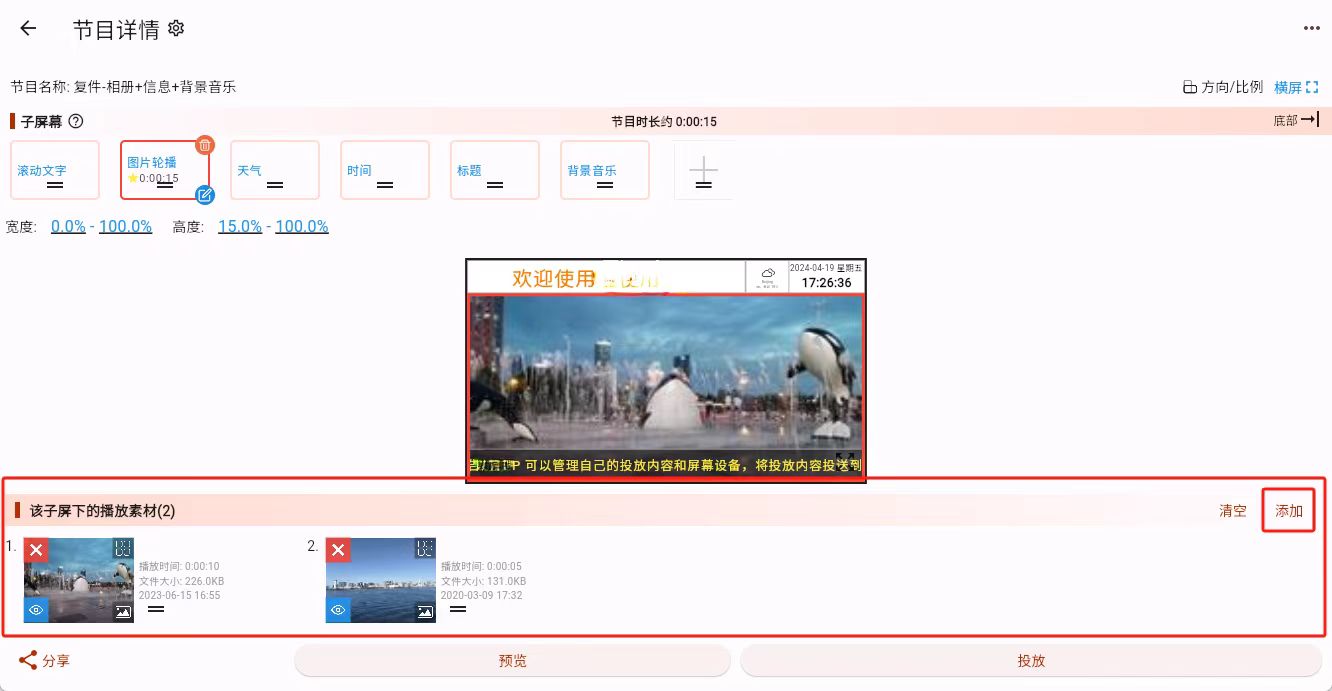
Step 2: Click Add Material
The material editing area is located at the bottom of the program editing interface. Click the add button in the upper-right corner of that area.
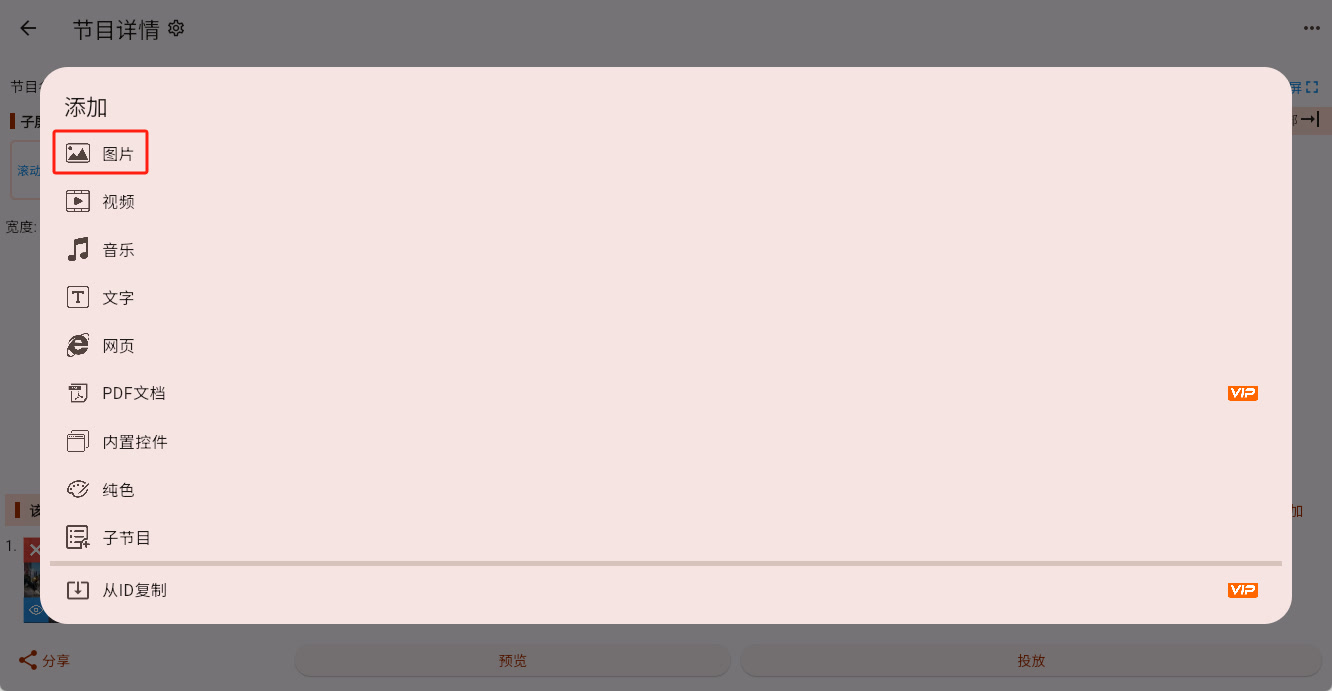
Step 3: Choose the Material Type
Here we use "add an image" as the example.
In the pop-up dialog, choose "Image."
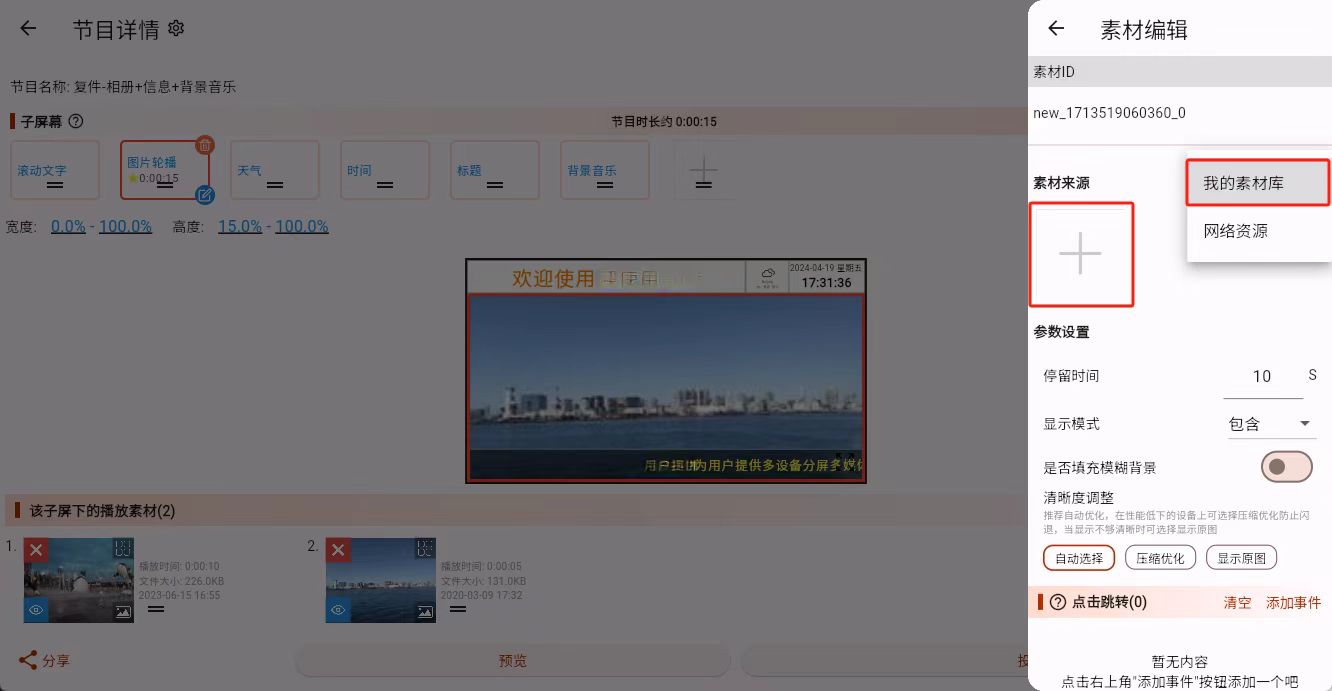
Step 4: Choose the Material Source
A material selection panel opens on the right side. By default, materials are usually selected from the online "My Gallery."
If you want to use an image from your computer or phone, click "Upload" first, upload the local file into the gallery, and then select it.
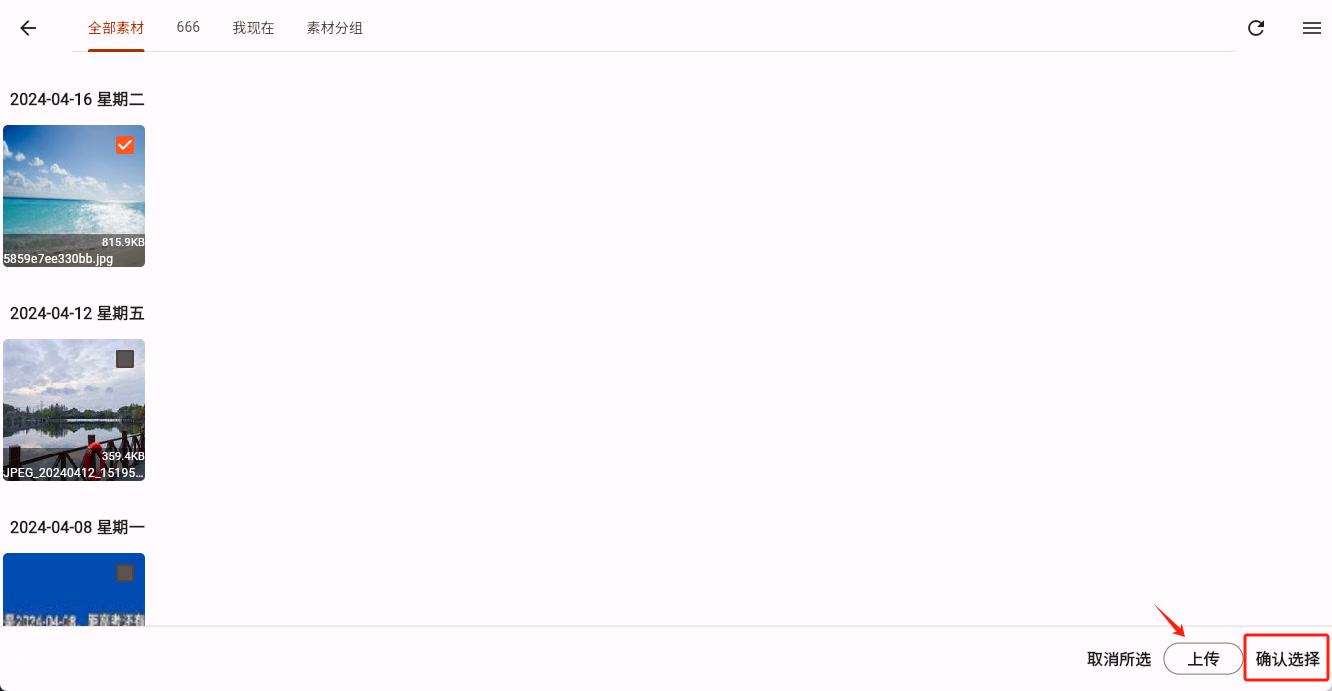
After choosing the material, click "Confirm Selection."
Step 5: Save the Change
When you return to the main program editing interface, the Save button appears whenever the program has unsaved changes. Click Save to make the newly added material really take effect.
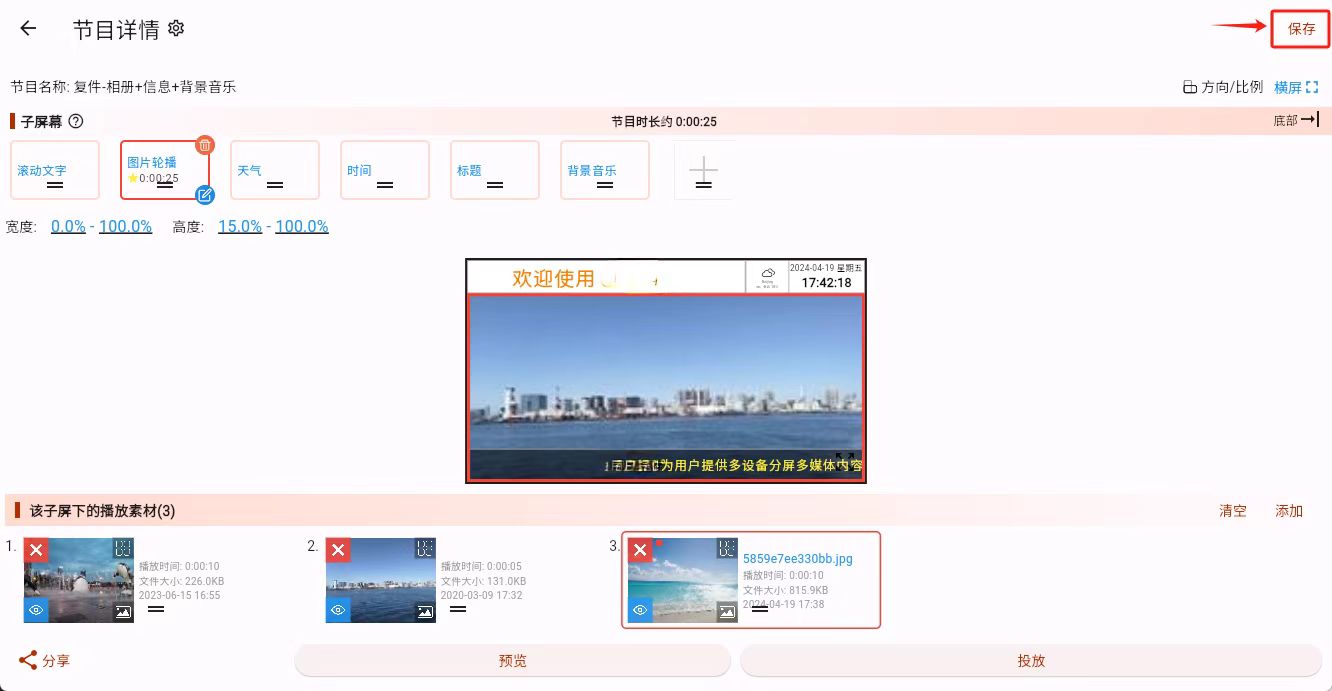
What Counts as Success
If you can already see the material inside the target sub-screen, and the save operation completes successfully, the material has been added successfully.
Next, you can:
- Add more materials to make that sub-screen rotate
- Click one material and continue adjusting its parameters
- Try another material type