Open this page when you are not satisfied with the current layout and want to add a new area, delete an area, or adjust the position and size of an area.
Below, we use an existing program as an example.
The current program looks like this:
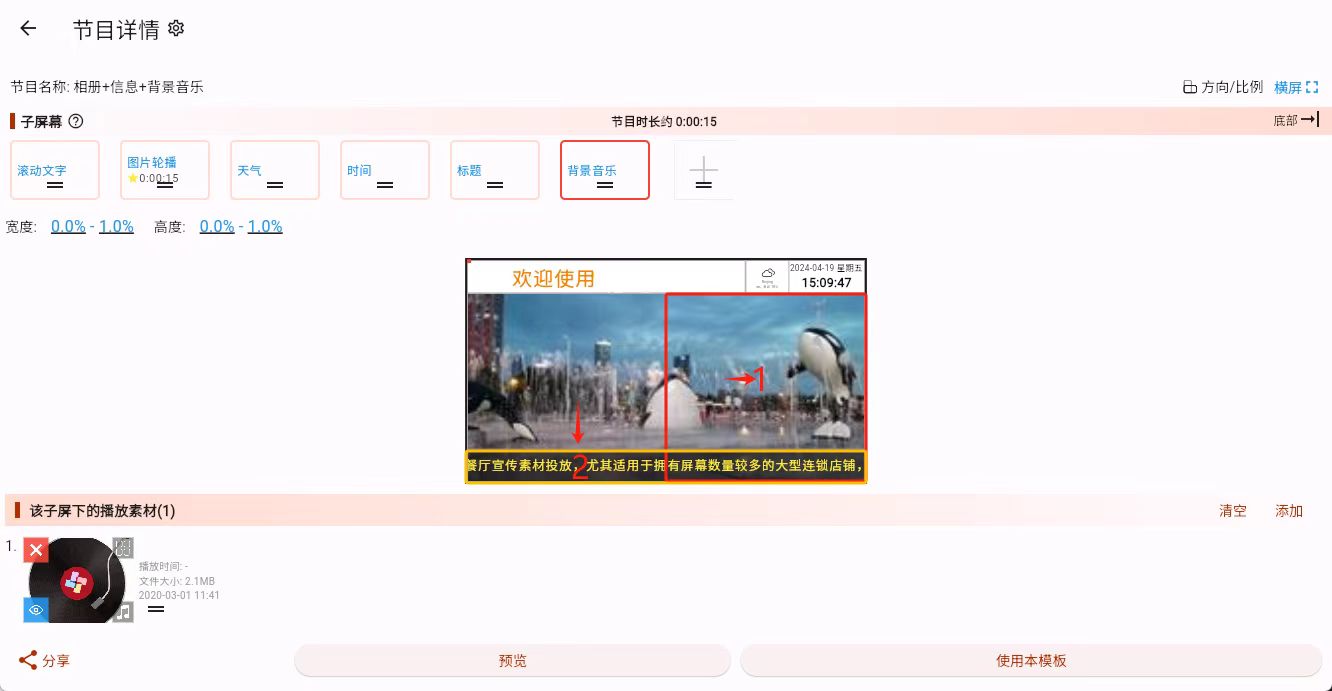
We will explain two common goals:
- Add another sub-screen in area 1 for video playback
- Delete the scrolling text sub-screen in area 2
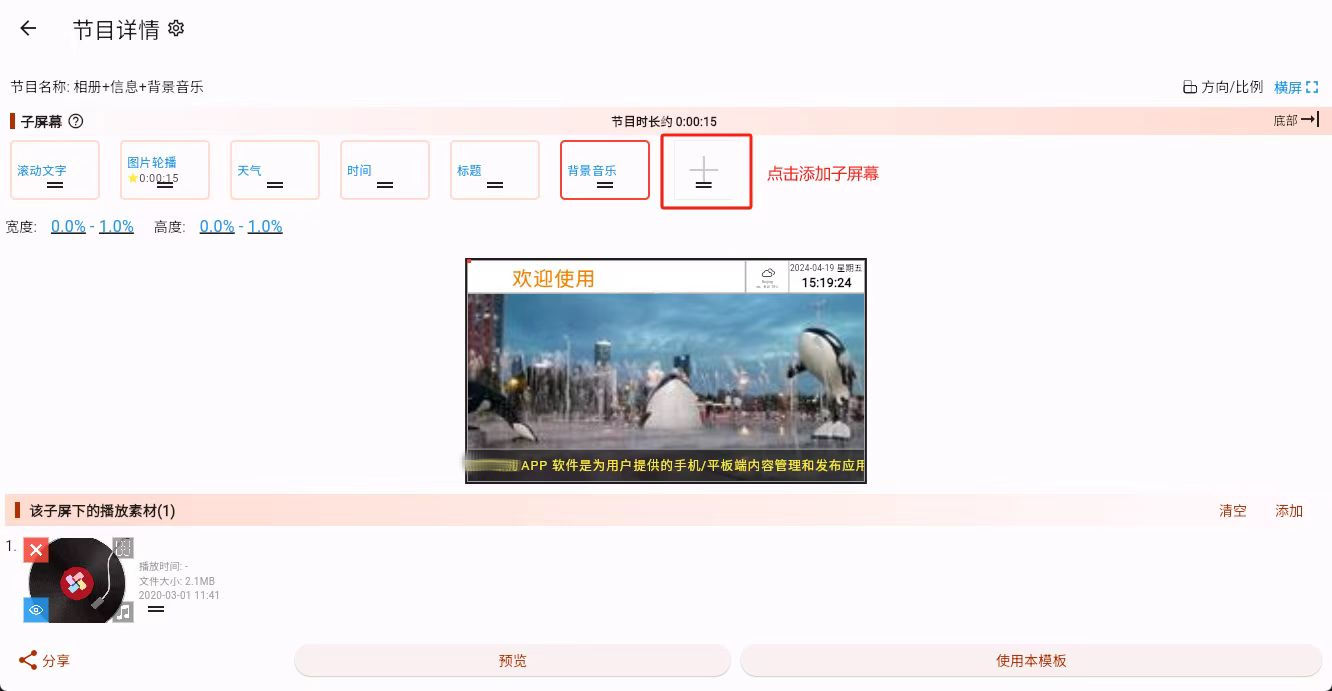
Add a Sub-screen
Click the add button at the end of the sub-screen list.
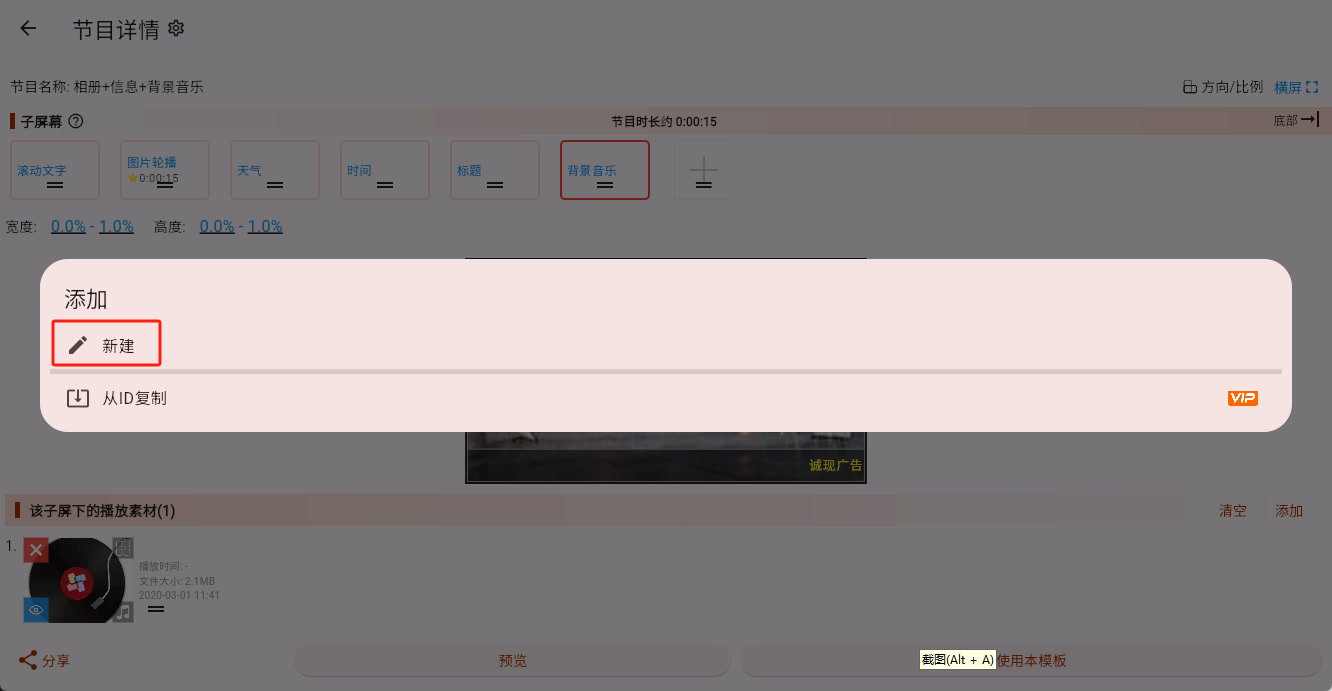
Just like program creation, sub-screens can also be copied by ID. But if you simply want to add a normal new area, click "New."
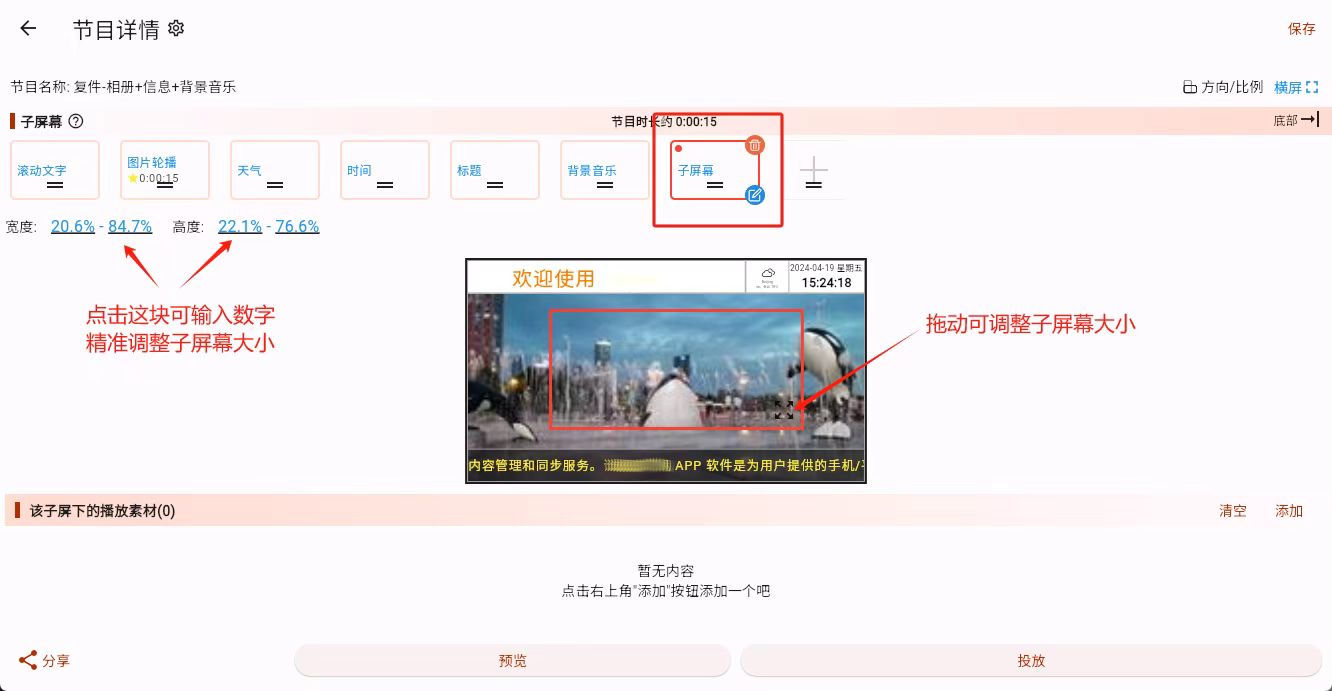
The new sub-screen is placed in the center by default. You can adjust it in two ways:
- Visual dragging Drag the sub-screen directly to move it, or drag the icon in the lower-right corner to resize it.
- Precise input If dragging is not accurate enough, you can directly enter percentage values for width, height, and starting position.
Once the new sub-screen appears in the correct place, the new area has been added successfully.
The next step is usually to add content into that sub-screen. Continue with Material Editing.
If you want to adjust more advanced settings for that sub-screen, such as animation, background, or focus behavior, continue with Sub-screen Parameters.
Delete a Sub-screen
Select the sub-screen you want to remove, then click the delete icon.
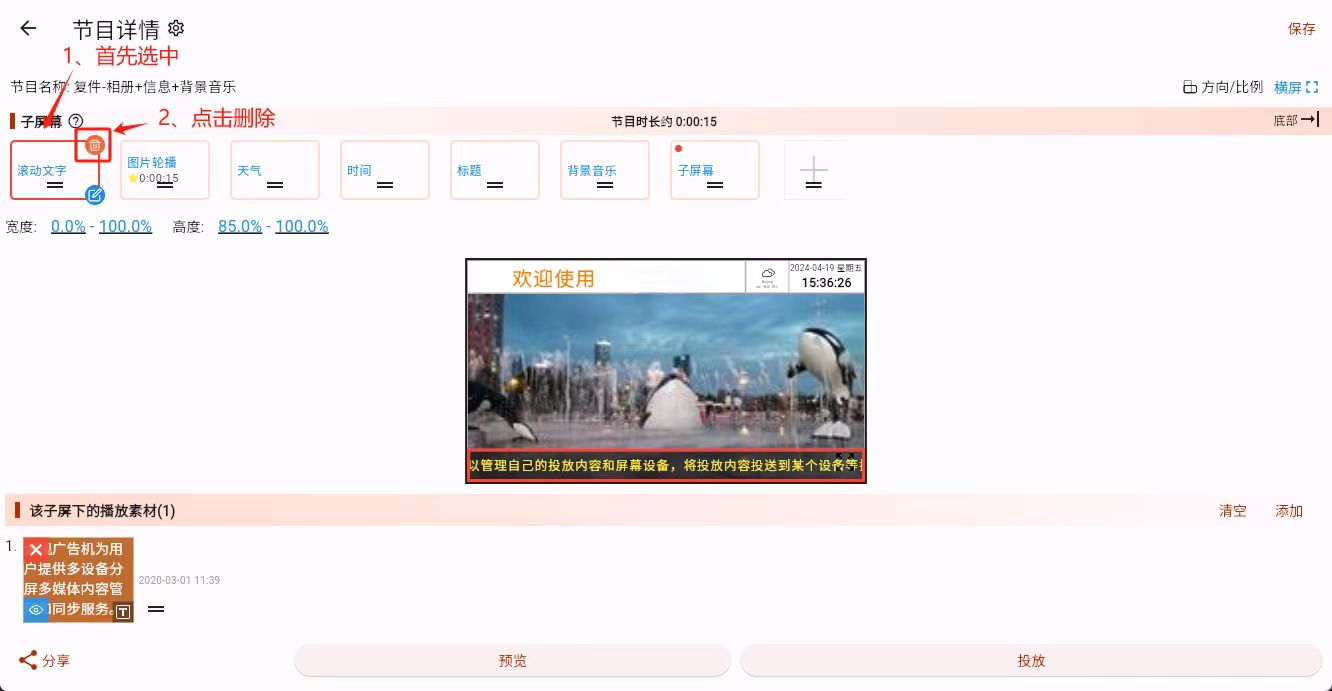
One important thing to remember:
When you delete a sub-screen, all materials inside that sub-screen are deleted together with it.
So before deleting it, make sure the content in that area is no longer needed.